How to get your free Dynamics 365 Business Central Demo Instance
Dynamics 365 Business Central is an online service by Microsoft – sold vis CSP (Cloud Solution Provider Program) by Microsoft partners on Microsoft Azure. It is an all-in-one business management solution that helps organizations connect their financials, operations, sales and service. Dynamics 365 Business Central brings the product maturity and full power of Dynamics NAV in the cloud, with capabilities spanning financial management, supply chain and inventory management, sales and service management, project management, and operations management.
Now, I am sure you are eager to get access to this awesome solution and demo Dynamics 365 Business Central to your prospects.
The 4 available options for you to access Dynamics 365 Business Central are:
Option 1: Make use of your work email address and sign up for the ‘non-expiring’ Dynamics 365 Business Central trial.
Option 2: Create a free Office 365, 90 day trial instance to sign up for a ‘non-expiring’ Dynamics 365 Business Central trial.
Option 3: This is the same as option 1, but, after 90 days stop to demo the Office integration.
Option 4: Purchase users of Business Central and consider it as a ‘cost of goods sold’.
And from the above four options, options 1, 2 and 3 are free, however, for the 4th option you will require to pay a certain amount per user per month.
Let me share with you the 10 quick steps with which I set up my FREE Dynamics 365 Business Central demo instance. I made use of Option 2.
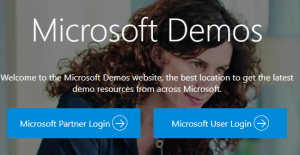
Step 1: Create an Office 365 Demo Account. Access the Microsoft Demos website – https://demos.microsoft.com/ and login with your credentials –

Step 2 Once you have successfully logged in to the Microsoft Demos website, you need to create a new Office 365 demo tenant –

Step 3 I chose the ‘Microsoft 365 Enterprise Demo Content’ –

Step 4 In a few minutes Microsoft made the demo tenant available for me and shared the login details with me –

Step 5: Access the Dynamics trials website – https://trials.dynamics.com (Please be aware, to avoid conflict with your local machine, use the “In Private” or “Incognito” browsing option.) –

Step 6 Login with the Office 365 demo tenant username and phone number –

Step 7 Once I clicked on the “Get Started” button, the following message was displayed to me –

Step 8 I clicked on the “Sign In” button and entered the password for the Office 365 demo tenant (Step 4) –

Click on “Yes” in the next message to ‘stay signed in’.
Step 9 I was displayed a ‘Almost There’ message with a ‘Start’ button. I clicked on the ‘Start ‘ button and waited for a few minutes for Microsoft to spin up the Dynamics 365 Business Central instance and assign it to the trial Office 365 demo tenant –

On the first login, I also get the initial message to access the ‘introduction videos’, help and assistance to make best use of this amazing solution.
Step 10 And there I was, in a few minutes, ready with a Dynamics 365 Business Central demo instance with demo data !
Hope this blog post is informative and of use for you 